 Durable Machinery
Get Price
5 Key Iron Ore Beneficiation Processes Explained
At Durable, our expertise in manufacturing Mineral Processing Equipment since 2001 has given us a deep understanding of what it takes to turn raw iron ore into a valuable product. You are likely here because you have an iron ore deposit and need to understand the path to profitability. The journey from raw stone to high-grade iron concentrate involves a series of critical steps known as the iron ore beneficiation process. This is not a one-size-fits-all solution; the right iron ore processing plant depends entirely on the unique characteristics of your ore. This guide will walk you through the five core processes that form the backbone of nearly every successful iron ore operation.
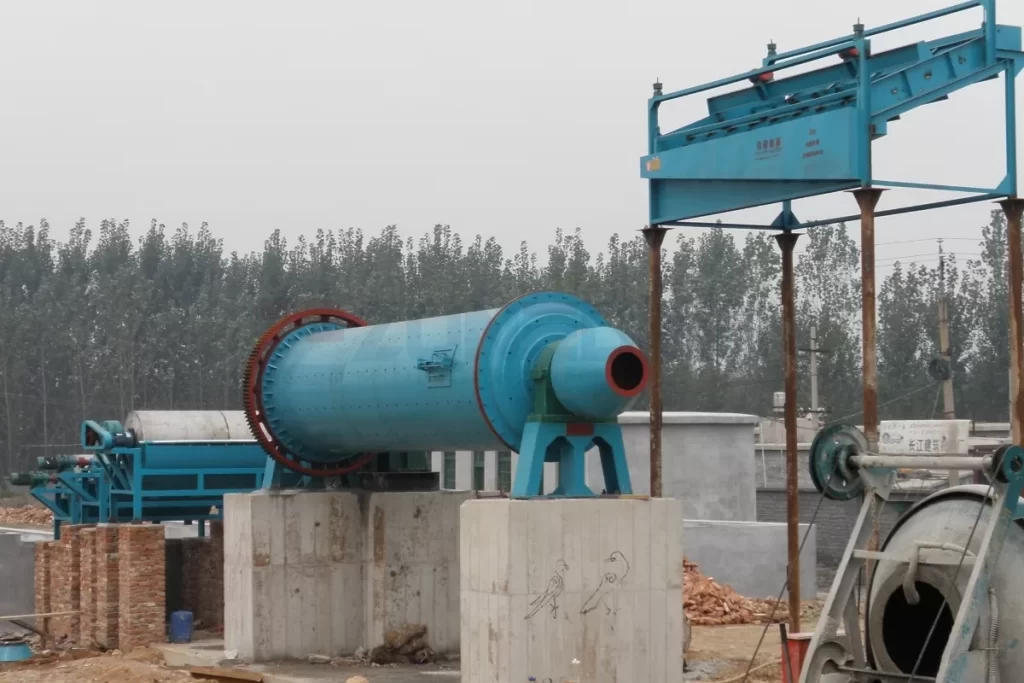
Table of Contents
- What Are the Main Types of Iron Ore?
- How Does Crushing and Grinding Prepare the Ore?
- What is the Best Process for Magnetic Iron Ore (Magnetite)?
- How Does Gravity Separation Work for Hematite?
- When Is Complex Froth Flotation Necessary?
- Why is the Final Dewatering Step Crucial for Reducing Costs?
- How to Combine These into a Complete Flowsheet?
- Conclusion and Our Recommendation
What Are the Main Types of Iron Ore?
Before you can design a plant, you must know what you are working with. The mineralogy of your ore dictates the entire beneficiation process. While many iron-bearing minerals exist, your plant will primarily be designed around one or a combination of these. Each type has a unique personality and requires a different approach.
Here is a quick breakdown of the main players:


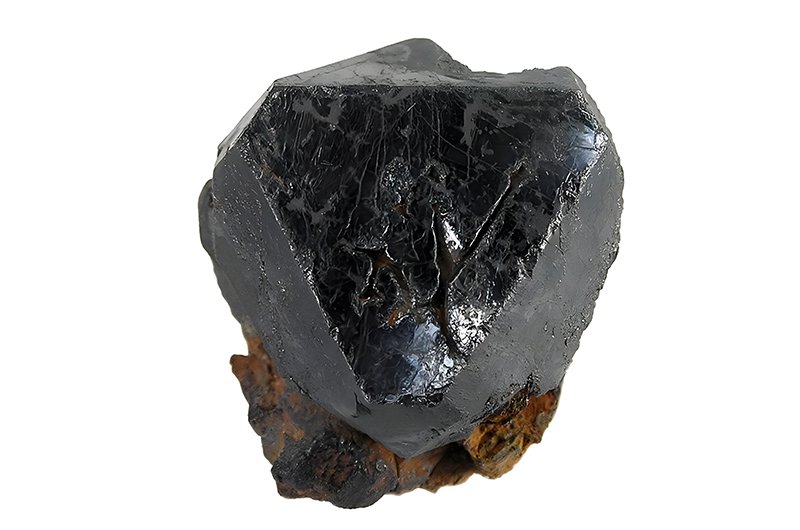
- Magnetite (Fe₃O₄): This is the star player when it comes to easy processing. It is strongly magnetic, which allows us to use simple and low-cost magnetic separation. If your deposit is rich in magnetite, your processing path will be more straightforward and generally cheaper. It is dark grey or black.
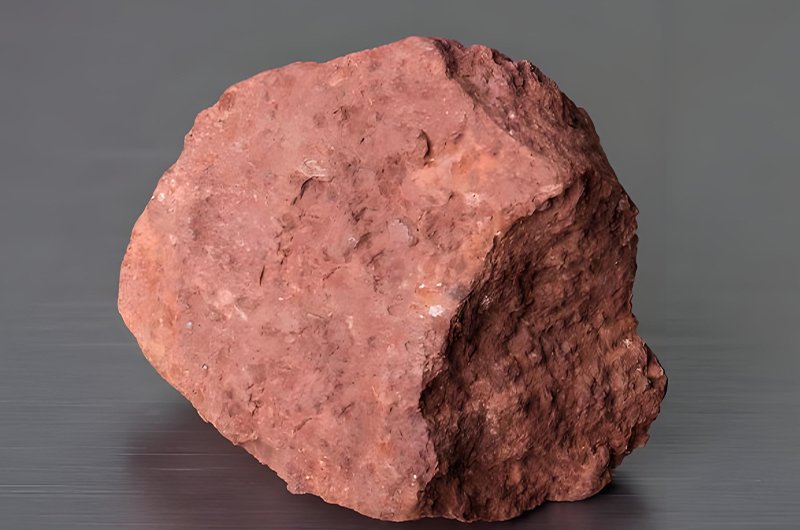
- Hematite (Fe₂O₃): This is the most abundant iron ore. However, it is only weakly magnetic. This means the simple magnetic process used for magnetite won’t work. We must use more advanced methods like gravity separation or froth flotation, which can increase complexity and cost. It is typically red or reddish-brown.
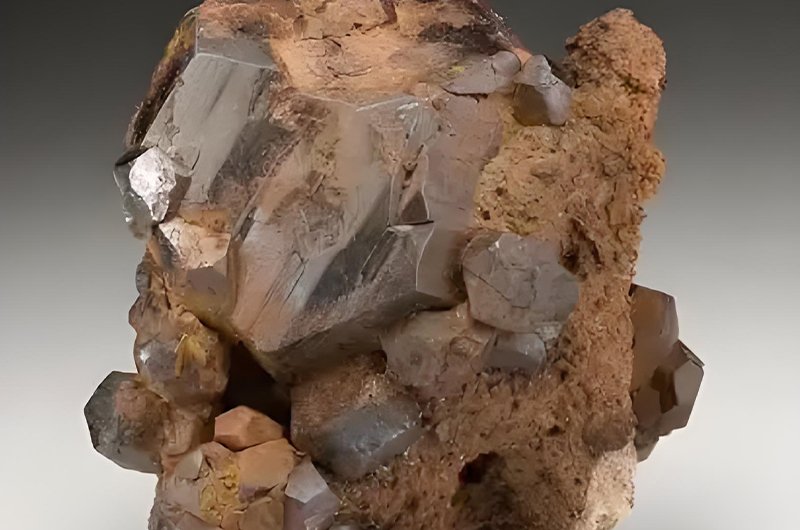
- Limonite (hydrated iron oxide): This is a yellowish-brown ore that is essentially rusted iron. Like hematite, it is weakly magnetic and requires gravity or flotation methods. It often contains significant water within its structure.
- Siderite (FeCO₃): This is an iron carbonate mineral. It is also weakly magnetic. Sometimes, it can be roasted (calcined) to convert it to magnetite before separation, adding an extra thermal processing step.
- Ilmenite (FeTiO₃): This mineral contains both iron and titanium. Processing ilmenite is a dual challenge, as you need to separate it not only from waste rock but potentially also separate the iron and titanium, requiring specialized flowsheets.
Understanding which of these minerals is dominant in your ore is the non-negotiable first step. It is the foundation upon which your entire investment rests.
How Does Crushing and Grinding Prepare the Ore?
This first stage is the most energy-intensive part of any iron ore processing plant, but its goal is often misunderstood. We are not just making big rocks small. The true objective is liberation. Think of it like trying to get almonds out of their shells. You have to crack the shell to free the valuable nut inside. In our case, we are breaking worthless rock (gangue) to free the valuable iron mineral particles. The size at which the iron becomes free is called the “liberation size,” and it is unique to every ore deposit.
This stage is a careful balancing act.
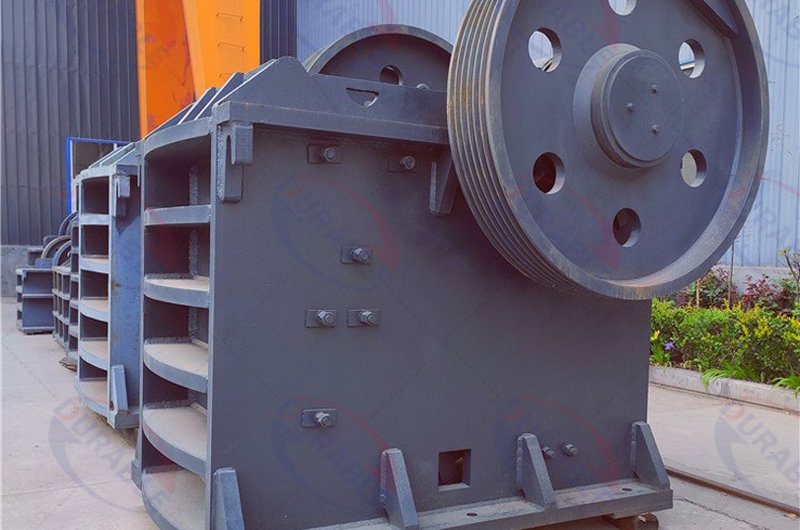
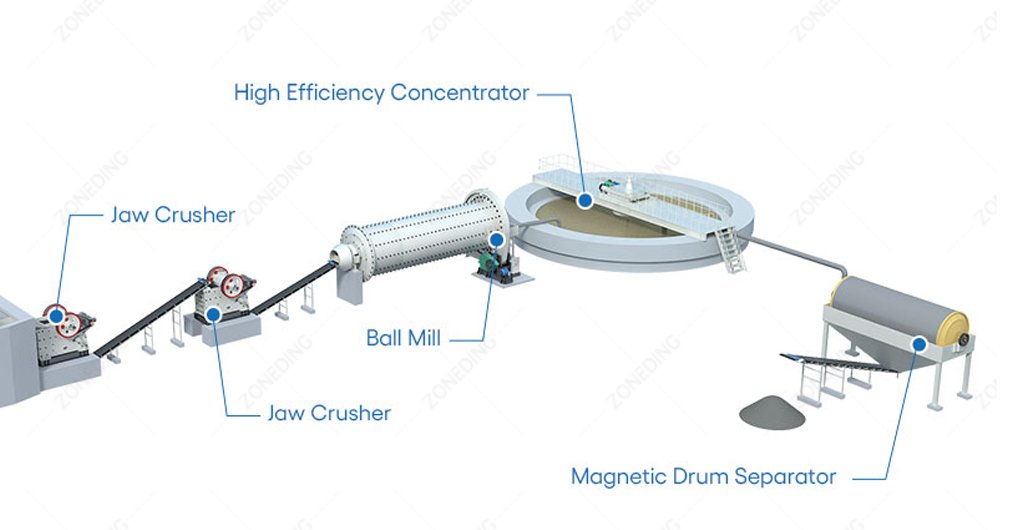
- Crushing: We start with large boulders from the mine and use a Jaw Crusher followed by cone crushers to reduce them to a gravel-like size. This is the brute-force part of the job.
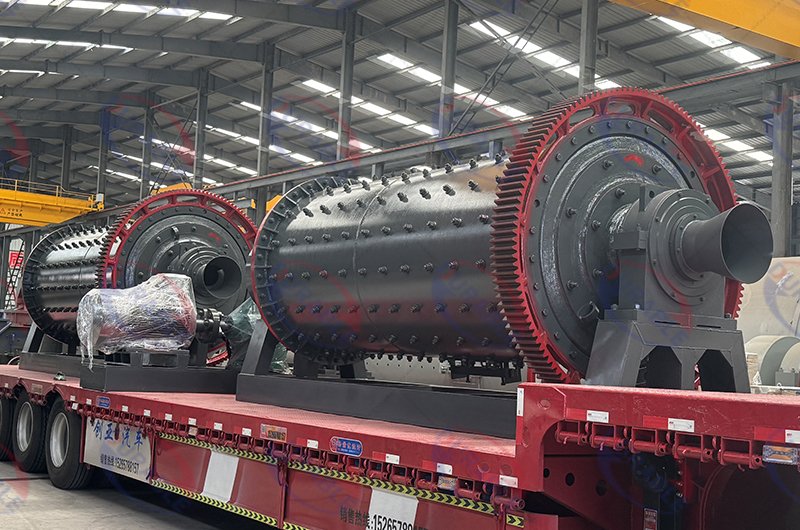
- Grinding: The crushed ore is then fed into a Ball Mill. This is a large rotating drum filled with steel balls. Here, the ore is ground into a fine powder, mixed with water to form a slurry. This is the precision part of the job, aiming to reach that perfect liberation size.
The major pitfall here is “over-grinding.” Grinding too fine wastes an enormous amount of electricity, which is your biggest operational cost. It also creates ultra-fine “slimes” or mud. This mud is like a poison for all the following separation stages, as it gets everywhere, reduces efficiency, and makes dewatering a nightmare. Investing in proper lab testing to find the perfect liberation size before you build will pay for itself a hundred times over in saved energy and higher recovery.
What is the Best Process for Magnetic Iron Ore (Magnetite)?
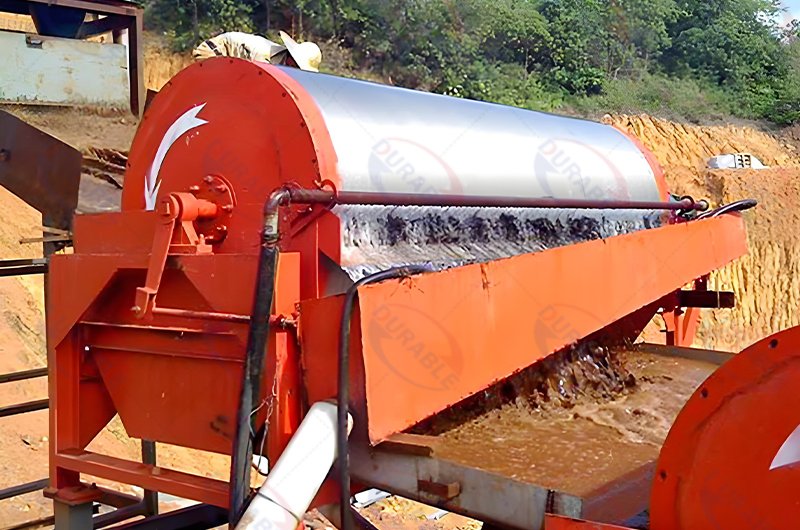
If your ore is magnetite, you are in luck. Magnetic Separation is an incredibly efficient, low-cost, and chemical-free method. It leverages the natural magnetic properties of the mineral to do all the hard work. The workhorse of this process is the Low-Intensity Magnetic Separator (LIMS), which is essentially a powerful magnetic drum.
The process is elegant in its simplicity. The ore slurry is fed into a tank where the magnetic drum rotates. The magnetite particles stick to the drum and are lifted out of the slurry, while the non-magnetic waste rock is left behind. However, the secret to a high-quality product is not just about having the strongest magnet. A magnet that is too strong will trap non-magnetic waste particles, lowering your concentrate grade.

True efficiency comes from managing the forces acting on each particle: the magnetic force pulling it to the drum, gravity pulling it down, and the force of the water washing it. A well-designed circuit uses this to its advantage:
- Rougher Stage: Uses a faster water flow to quickly recover as much magnetic material as possible, maximizing recovery.
- Cleaner Stage: Uses a stronger, opposing water flow to wash away any trapped waste particles from the concentrate, maximizing the final grade.
- Scavenger Stage: Takes the waste stream from the rougher and tries to recover any fine or weakly magnetic particles that were missed the first time.
This multi-stage approach, which balances water flow and magnetic force, is how we produce a high-grade concentrate efficiently, not just by using brute magnetic strength.
How Does Gravity Separation Work for Hematite?
When you have non-magnetic hematite, you need a different trick. Gravity Separation is one of the oldest and most cost-effective methods. It works on a simple principle: iron minerals are much denser (heavier) than the waste rock they are mixed with. It is the same principle as panning for gold, but on a massive industrial scale.


There are two main pieces of equipment we use for this:
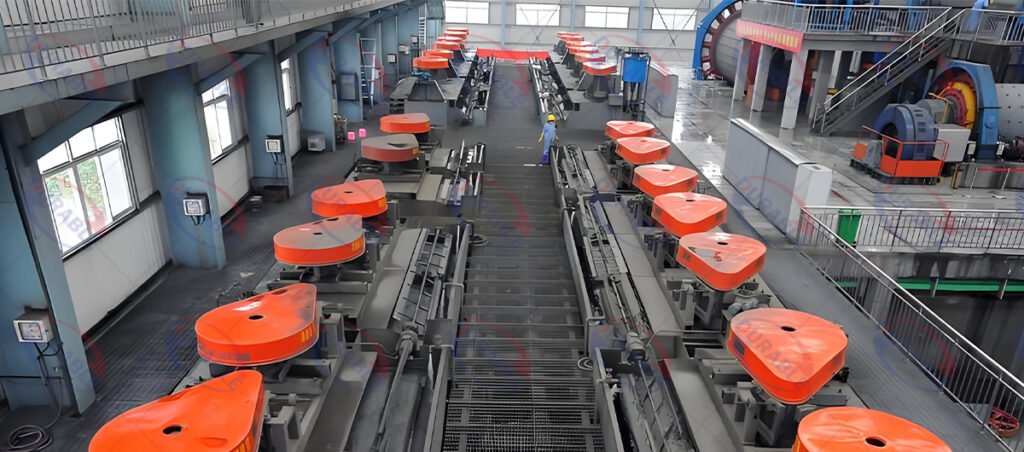
- Spiral Concentrators: These are large, corkscrew-shaped towers. As the slurry flows down the spiral, physics takes over. The heavier iron particles are flung to the outside edge of the spiral, while the lighter waste particles ride higher on the inside edge. A set of splitters at the bottom separates the two streams. It is a simple, high-capacity, and low-energy solution.
- Shaking Tables: A shaking table is a flat, tilted surface with small ridges called riffles. The table shakes back and forth rapidly. The heavy iron particles get trapped by the riffles and are channeled to one side, while the lighter waste material gets washed over the top of the riffles and exits on the other side.
The key to successful gravity separation is preparation. This method struggles with very fine mud or slimes. Therefore, a successful gravity circuit will always include a “desliming” step first to wash away the useless mud. It also works best when particles are sorted by size. By “desliming” and sizing the feed material first, you allow the gravity separation equipment to work in its ideal conditions, dramatically improving its efficiency.
When Is Complex Froth Flotation Necessary?
Sometimes, the iron minerals are ground so fine to achieve liberation that they are like dust. At this size, both magnetic and gravity methods become inefficient. This is when we turn to a more powerful, but also more complex and expensive, chemical process called Froth Flotation. This technique separates minerals based on their surface chemistry.
The most common method for iron ore today is Reverse Flotation. It is a clever approach. Instead of floating the valuable iron, we float the waste away.
- Depression: First, we add a reagent like corn starch that coats the iron particles and “depresses” them, making them water-loving and wanting to sink.
- Collection: Next, we add a “collector” reagent. This chemical only attaches to the surface of the waste particles (like silica), making them water-hating (hydrophobic).
- Flotation: We then bubble air through the slurry in flotation cells. The waste particles, now water-hating, grab onto the air bubbles and float to the surface as a froth, which we skim off and discard as tailings.
- Collection: The valuable iron minerals, which were depressed, are left at the bottom of the cell and collected as the final concentrate.
Why do it in reverse? In most ores, there is more iron than waste. It requires fewer chemicals and less energy to float the smaller amount of waste than it does to float the larger amount of iron. However, this process is sensitive. The water quality and pH level must be perfectly controlled, making it a high-tech solution for challenging ores.
Why is the Final Dewatering Step Crucial for Reducing Costs?
After all the separation is done, your high-grade iron concentrate is mixed with a lot of water. It is a thick, muddy slurry. Shipping this slurry is incredibly expensive because you are paying to transport water. The final Dewatering stage is designed to solve this problem and is essential for profitability.

This final step typically involves:
- Thickeners: Large, circular tanks where the concentrate is allowed to settle. The solid particles sink to the bottom, forming a thicker pulp, while clear water is recovered from the top and recycled back into the plant.
- Filters: The thickened pulp is then pumped to large filters (like disc filters or press filters) that squeeze out most of the remaining water.
The result is a final product that looks like a damp cake, with a moisture content of around 8-10%. This material is easy to handle, significantly cheaper to transport by truck, train, or ship, and is in the ideal state for the steelmaking process. Skipping or under-designing this step can erode the profit you have worked so hard to create.
How to Combine These into a Complete Flowsheet?
There is no single “best” iron ore processing plant. The right solution is a custom-designed Mineral Processing Flowsheet that combines these core processes in a way that is perfectly tailored to your specific ore. The flowsheet is your plant’s recipe for success.
Here are two common examples:
- Simple Magnetite Flowsheet: For a straightforward, strongly magnetic ore, the flowsheet might be: Crushing -> Grinding -> Multi-Stage Magnetic Separation -> Dewatering. This is a relatively low-cost and robust process.
- Complex Hematite Flowsheet: For a challenging ore with very fine, non-magnetic hematite, the flowsheet could be much more complex: Crushing -> Grinding -> Desliming (to remove mud) -> Reverse Flotation -> Dewatering. This plant would be more expensive to build and operate but is necessary to recover value from such an ore.
The key is to create a flowsheet where each step prepares the material perfectly for the next. This synergy between the stages is what makes a processing plant efficient and profitable.
Conclusion and Our Recommendation
Choosing the right iron ore beneficiation process is the most important financial decision you will make for your mining operation. It is a decision that must be driven by data. Our most important piece of advice is this: invest in thorough, professional metallurgical testing before you do anything else.
This testing will give you the blueprint. It will tell you if you have magnetite or hematite, how fine you need to grind it, and which separation technology will give you the best recovery at the lowest cost. From there, we can help you build the right flowsheet with the right equipment.