 Durable Machinery
Get Price
How to Correctly Install and Commission a Ball Mill?
At Durable Machine, we understand that a ball mill is a significant investment. Its long-term performance, efficiency, and safety depend almost entirely on a correct ball mill installation and commissioning process. A small mistake here can lead to years of high operating costs and premature failures. This guide provides a professional, step-by-step procedure based on our years of experience manufacturing and overseeing these projects worldwide. Following these steps is the key to a long and productive service life for your equipment.
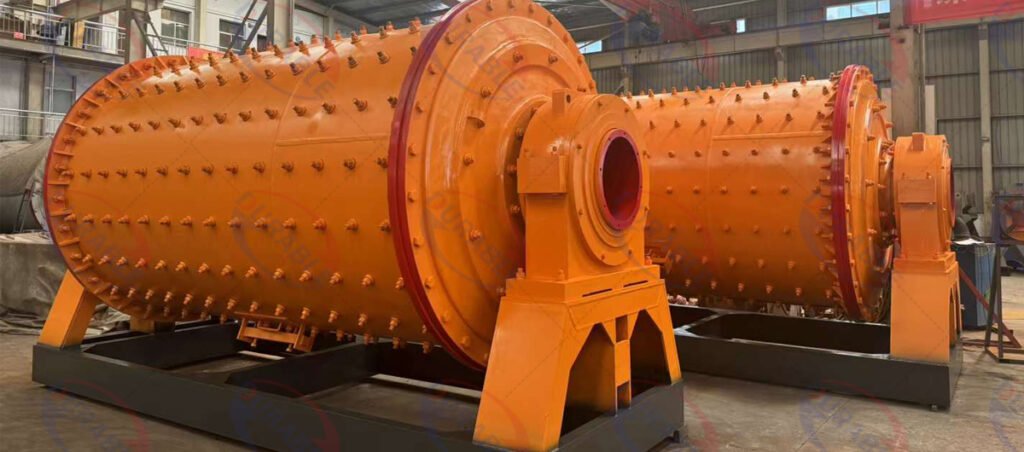
Table of Contents
- What is the structure and working principle of a ball mill?
- What is the installation sequence for a ball mill?
- Why is precise gear alignment key for long-term operation?
- What should you monitor during a no-load test run?
- How do you perform a load test run?
- How to troubleshoot common commissioning problems?
- How to establish a daily maintenance checklist?
- Common Questions Answered
- Summary and Recommendations
What is the structure and working principle of a ball mill?
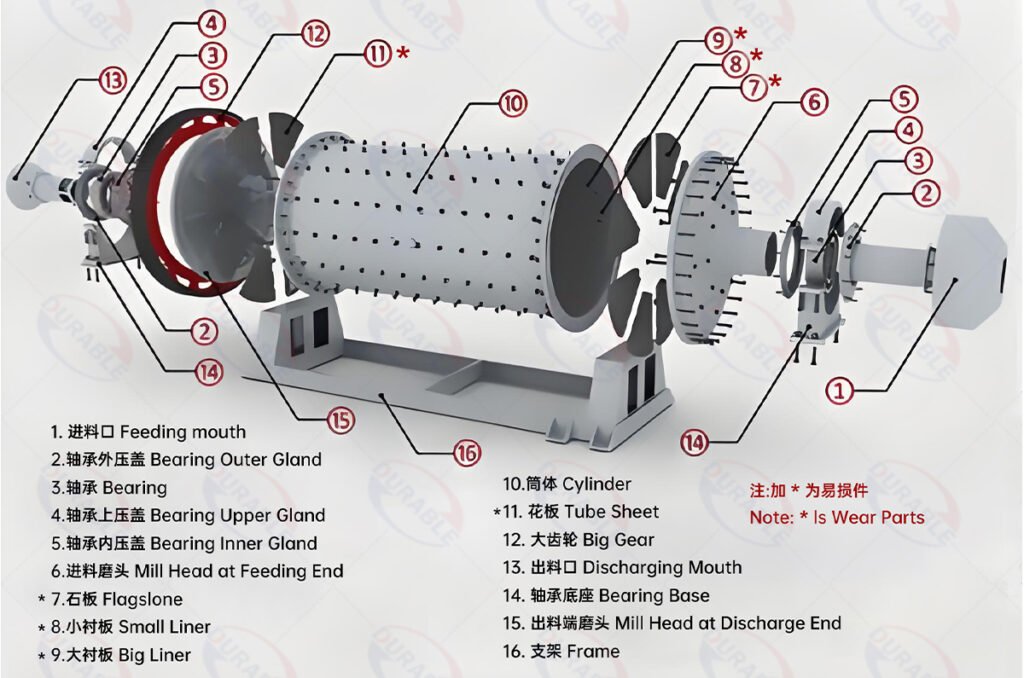
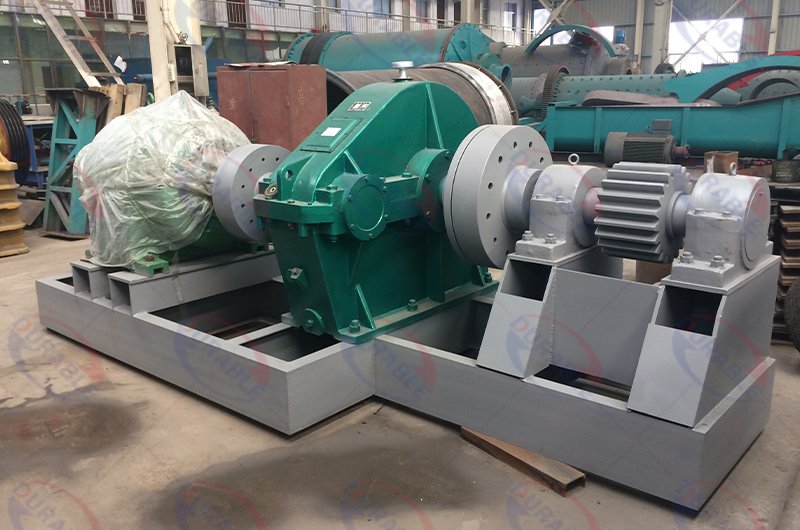
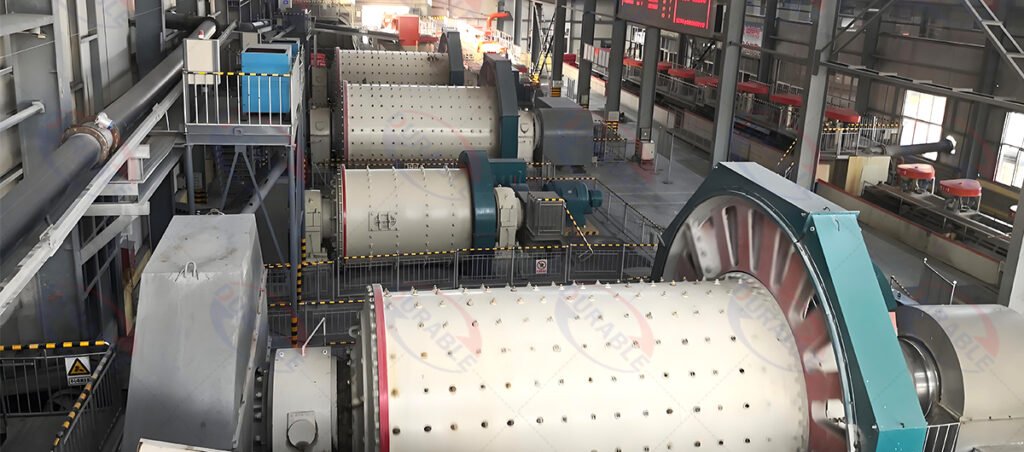
Before installation, it is vital to understand the machine’s basic components and function. A ball mill is a large rotating cylinder (shell) lined with wear-resistant plates (liners). It is filled with grinding media (steel balls) and the material to be ground. The shell is supported by large main bearings and rotated by a powerful drive system, which consists of a motor, a gearbox, a small pinion gear, and a large girth gear mounted on the shell.
As the mill rotates, the steel balls are lifted and then cascade or cataract down, crushing and grinding the material through impact and attrition. The correct assembly of these heavy, precision components is the entire goal of the ball mill installation process. Each part must work in perfect harmony with the others. For a more detailed look, you can review our guide on .
What is the installation sequence for a ball mill?
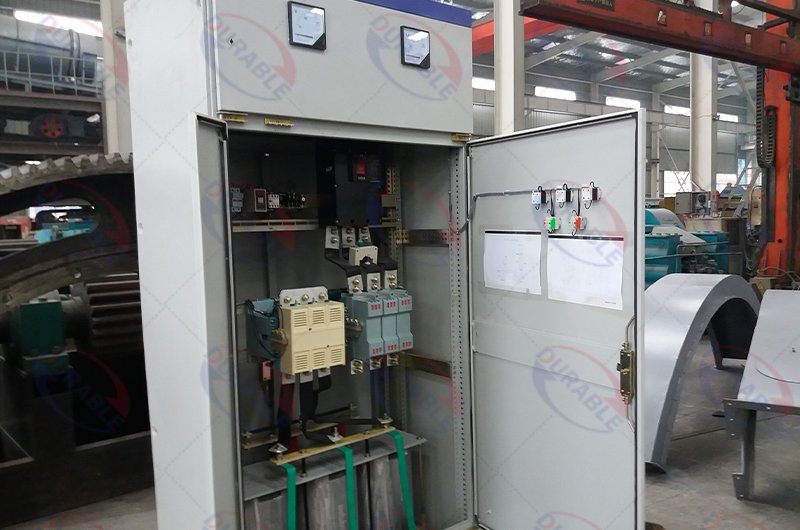
A successful ball mill installation follows a strict, logical sequence. Rushing or skipping a step is the most common cause of future problems. We break the process into three main phases: foundation preparation, mechanical assembly, and electrical connection.
The foundation is the bedrock of your installation. Before any parts are uncrated, you must perform the foundation acceptance. This means verifying that the concrete base was built exactly according to our drawings, including the correct strength and full curing time (typically 28 days). The anchor bolts must be in the perfect position. Only then can you begin the mechanical assembly. This involves carefully lifting and placing the main bearings, the shell, the gears, and the drive system. Every step requires precision measurement and alignment.
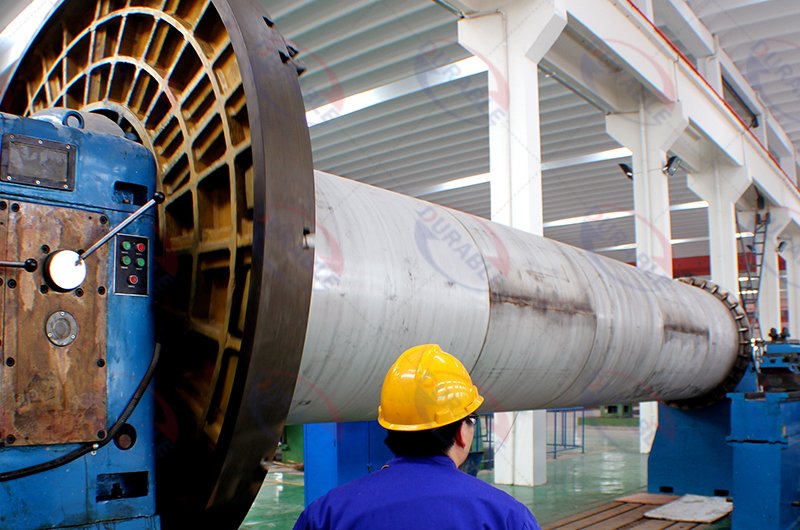
Main Bearing and Shell Installation
The main bearing installation is the first mechanical step. The bearing pedestals are placed over the anchor bolts and meticulously leveled using steel shims and laser alignment tools. Once perfect, the space beneath them is filled with non-shrink grout to create a solid, permanent base. After the grout cures, the main mill shell is carefully lifted and lowered onto the bearings.
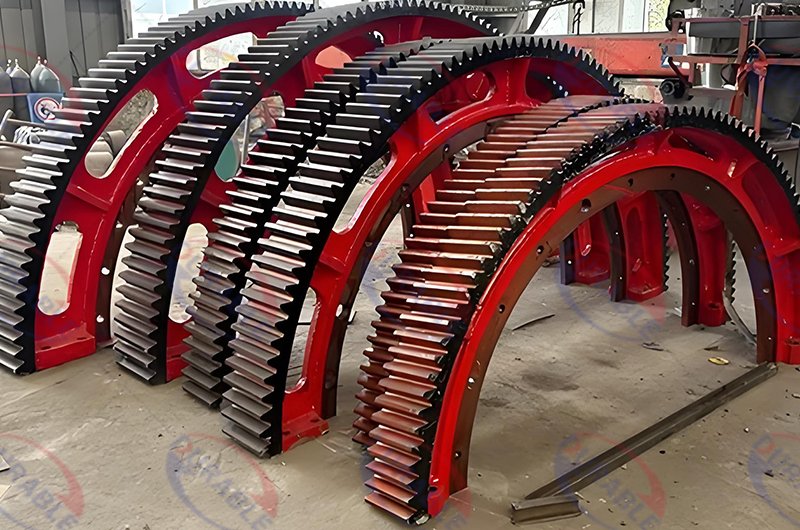
Girth Gear and Drive System Installation
The large girth gear, which usually comes in two halves, is bolted around the shell. This is a critical step. You must use a dial indicator to check the gear’s radial and axial runout (wobble) as you slowly rotate the shell. This must be within our specified tolerance. Next, the drive system, including the motor, gearbox, and pinion, is installed and aligned with the girth gear.
Liner and Ancillary Systems Installation
Installing the liners is a heavy manual job inside the mill that requires strict safety protocols for confined spaces. All liner bolts must be tightened to the correct torque. Finally, all feeding and discharge chutes, lubrication systems, and cooling circuits are connected. It is crucial to flush the entire lubrication system to remove any debris before startup.
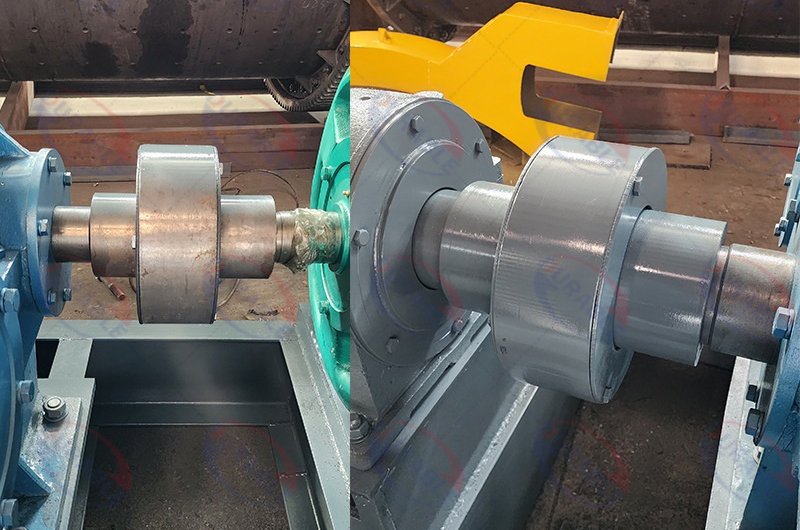
Why is precise gear alignment key for long-term operation?
Precise gear alignment is the single most important factor for the life of your drive train. The large girth gear and the small pinion gear must mesh perfectly. If they are misaligned, the load will not be distributed evenly across the face of the gear teeth. This leads to very specific and costly problems.
An improperly aligned gear set will cause localized high pressure on the gear teeth, leading to rapid, uneven wear, pitting, and eventually, tooth breakage. This is a catastrophic failure that results in expensive downtime and repairs. Furthermore, misalignment is a primary cause of abnormal vibration and excessive noise, which puts stress on the entire drive system, including bearings and couplings. The goal of gear alignment is to achieve a perfect contact pattern between the teeth and the correct amount of backlash (the small gap between them). We use marking grease and feeler gauges to verify this. Investing time in perfect alignment during installation will save you thousands of dollars in operational and maintenance costs over the mill’s lifetime.
What should you monitor during a no-load test run?
The no-load test run is the first time you bring the ball mill to life. This ball mill test run is done without any grinding media or material inside. Its purpose is to verify the mechanical and electrical integrity of the installation. This test should run for at least 4 to 8 hours continuously.
During this critical phase, you must monitor several key parameters closely. Any unusual reading is a sign to stop immediately and investigate the cause before any damage occurs.
- Bearing Temperature: This is the most critical parameter. The bearing temperature will rise and then stabilize. A normal stabilized temperature is typically between 50-70°C (122-158°F). Any temperature that continues to rise rapidly or goes above 80°C (176°F) is an alarm condition.
- Vibration Levels: The mill should run smoothly with very low vibration. Use vibration analysis equipment to check for any imbalance or misalignment issues.
- Motor Current: The electrical current (amperage) drawn by the motor should be low and stable. Any spikes or fluctuations can indicate a problem.
- Abnormal Noises: Listen carefully for any scraping, knocking, or grinding sounds. A properly installed mill should have a consistent, smooth humming sound.
How do you perform a load test run?
After a successful no-load test, the ball mill commissioning moves to the load test phase. This is where you introduce the grinding media and material to verify the mill’s performance under real working conditions. This must be done gradually.
First, stop the mill and load the specified charge of steel balls. Then, perform another test run for 4-8 hours with only the balls inside. Monitor the same parameters as the no-load test; the motor current and bearing temperatures will be higher but should still stabilize. Once this is successful, you can begin the “wet commissioning.” Start the mill with the balls, introduce water, and then slowly begin feeding the ore. Gradually increase the feed rate over several hours until you reach the designed capacity. During this load test run, you will verify the mill’s power draw, its throughput in tons per hour, and the fineness of the ground product by taking samples.
| Commissioning Phase | Key Action | What to Verify |
|---|---|---|
| No-Load Test | Run the mill empty for 4-8 hours. | Stable bearing temperature, low vibration, low motor current. |
| Media Load Test | Add steel balls and run for 4-8 hours. | Stable temperatures/vibration under media load. |
| Full Load Test | Gradually add water and ore to capacity. | Mill achieves design power draw, throughput, and grind size. |
How to troubleshoot common commissioning problems?
During ball mill debugging, you may encounter some common issues. Knowing the likely root cause can help you solve them quickly.
- Abnormal Vibration: This is often caused by a poor foundation, misalignment of the drive system or couplings, or an imbalanced installation of the liners inside the shell. Re-check all alignment readings.
- High Bearing Temperature: The most common causes are insufficient or incorrect lubrication, misalignment putting stress on the bearing, or an incorrect bearing clearance set during installation.
- Excessive Noise: This usually points to a problem with the gears. Check the gear backlash and the tooth contact pattern. It can also be caused by loose liner bolts or foreign objects inside the mill.
After the first 24-48 hours of full load operation, it is absolutely essential to stop the mill, lock it out, and re-torque all the liner bolts. They will settle under the initial impacts, and tightening them prevents future damage.
How to establish a daily maintenance checklist?
Once your ball mill is successfully commissioned, establishing a routine is key to reliability. A simple daily equipment maintenance checklist can prevent major problems. We recommend your operators perform these checks at the start of every shift.
- Lubrication: Visually check the oil levels in the gearbox and lubrication systems. Ensure grease is being delivered to the bearings and gears.
- Temperatures: Check the main bearing and motor temperatures. Keep a log to spot any rising trends.
- Listen: Listen for any changes in the sound of the mill. An experienced operator can often hear a problem before it becomes serious.
- Look for Leaks: Visually inspect all flanges, seals, and connections for any slurry or oil leaks.
- Check Bolts: Visually inspect key bolts on the bearing pedestals and gear housings to ensure none have loosened.
Common Questions Answered
Q1: How long does a typical ball mill installation take?
A: The timeline can vary significantly depending on the size of the mill and site conditions. However, a standard installation procedure for a medium-sized mill typically takes between 2 to 6 weeks. This does not include the 28-day curing time required for the concrete foundation. Precision and patience are always more important than speed.
Q2: What are the most important safety precautions during installation?
A: Lock-Out/Tag-Out (LOTO) procedures are absolutely mandatory before any person performs maintenance or inspection. This ensures the equipment cannot be accidentally energized. Additionally, strict Confined Space Entry protocols must be followed for any work inside the mill shell. Never work on the mill while it is capable of moving.
Q3: Why is it so important to re-torque the liner bolts after the initial run?
During the first hours of operation, the intense and constant impact of the steel balls causes the heavy liners to settle firmly against the mill shell. This settling process creates microscopic gaps, causing the bolts to become loose. Re-torquing them ensures they are perfectly tight, which prevents the bolts from breaking and the liners from coming loose, which could severely damage the mill shell.
Q4: What kind of foundation is required for a ball mill?
A: A ball mill requires a massive, reinforced concrete foundation designed specifically for its weight and dynamic loads. We at Durable Machine provide detailed civil engineering drawings for every mill we sell. The foundation must have the specified concrete strength (e.g., C30/C40) and be built on stable ground to prevent any sagging or cracking over time.
Q5: Can our company use its own crew for the installation?
A: While it is possible, we highly recommend using a crew with proven experience in heavy rotating equipment or hiring a technical advisor from the manufacturer. The tolerances for a ball mill installation, especially for gear alignment and bearing leveling, are extremely tight. A lack of experience can easily lead to critical errors that cause premature failure and void the warranty.
Summary and Recommendations
A successful ball mill installation is a systematic process that demands expertise, precision, and a commitment to following the correct procedures. From verifying the foundation to executing the final load test run, every step is critical for the long-term health and efficiency of your machine. As we have outlined, paying meticulous attention to gear alignment, carefully monitoring bearing temperature during commissioning, and establishing a daily maintenance routine are not just suggestions—they are essential practices for any serious operation.
By following this professional guide from Durable Machine, you are laying the groundwork for a reliable and profitable grinding circuit. This careful, methodical approach ensures your significant investment will perform to its design specifications for many years, providing you with a strong return.